in my kitchen · Uncategorized

Marilyn’s (almost just like Timmy’s) chocolate chip muffins

DSC_0104

Did I mention that  I love to bake?  I guess you already know that.  But, I especially love to bake when something turns out well beyond expectations.

That happened this weekend on Saturday.  I was shocked.  I was floored.  I was flabbergasted.  all after one bite.  I closed my eyes and savored the flavor and the texture and for a moment I was an eight year old little girl on Sunday morning all over again.

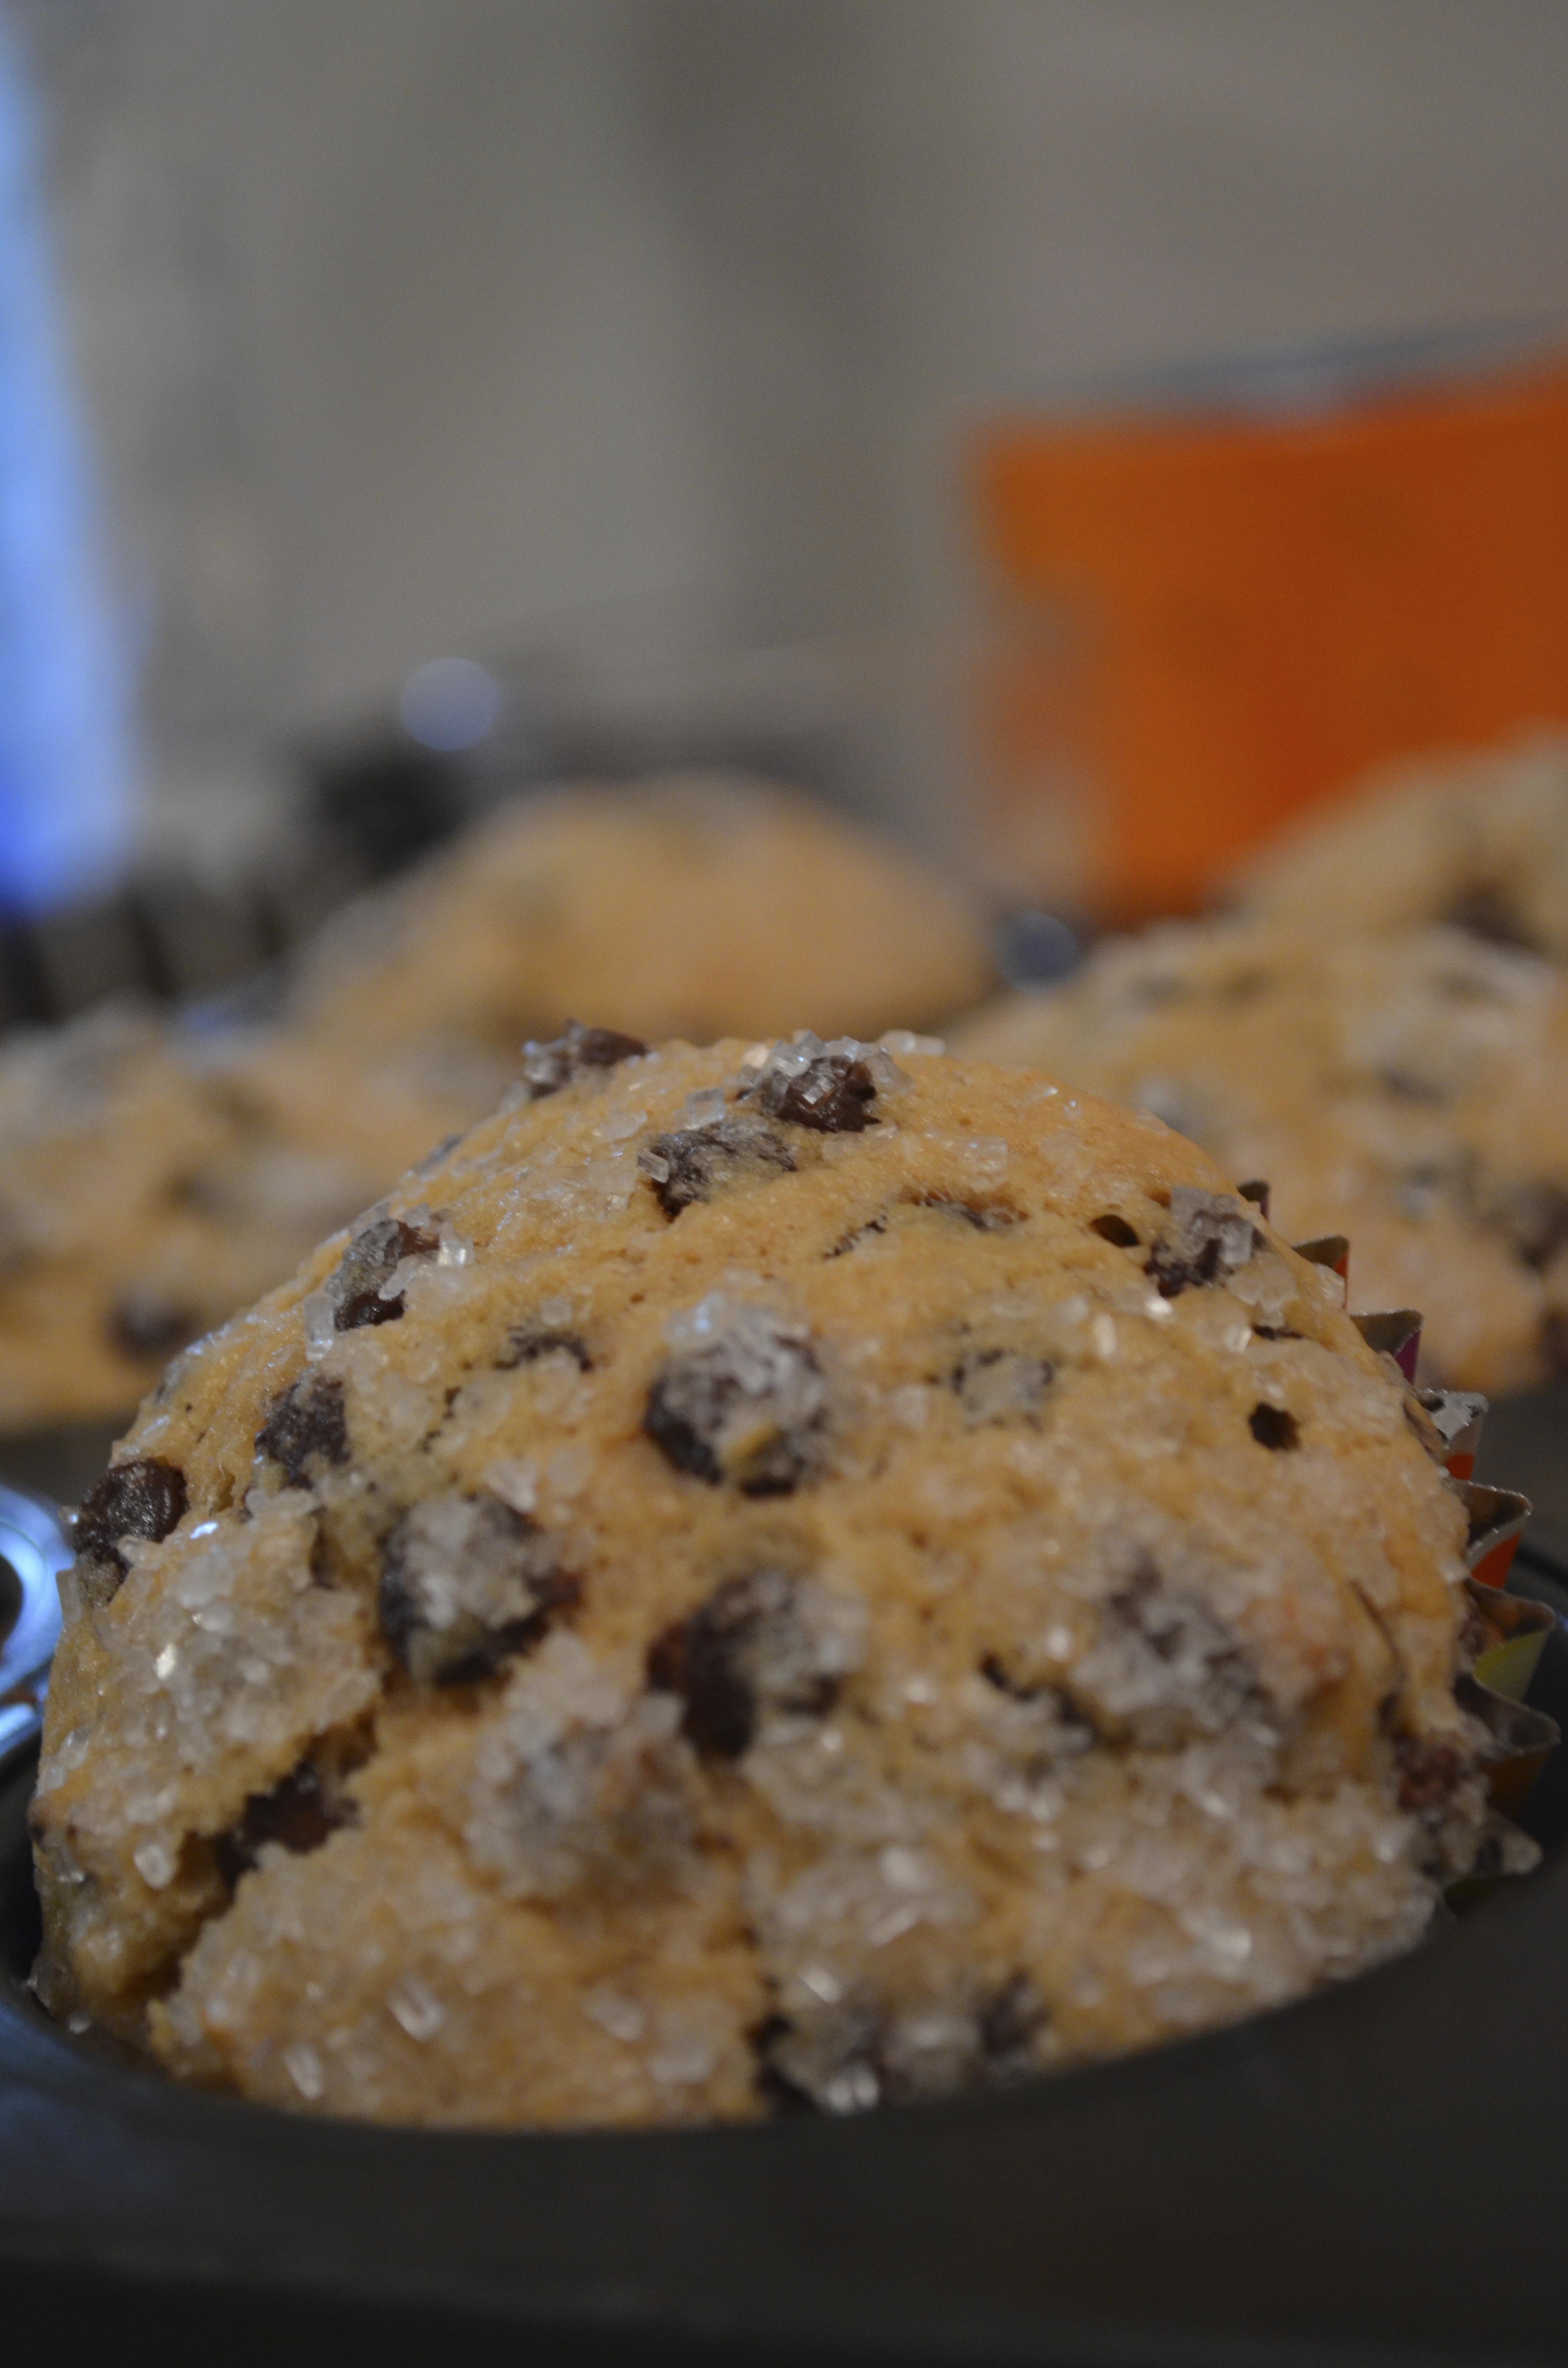
I didn’t think it would ever happen, but my sister (who also loves to bake)  found a recipe for chocolate chip mufffins that recreates the Tim Horton’s chocolate chip muffins. Oh how I loved a chocolate chip muffin from Tim Horton’s with an ice cold milk.

Yummmmm…..  (my mouth just watered thinking about it.)

If you don’t know about Tim Horton’s, I’ll have to enlighten you in a separate blog post.  Or maybe you can do a google search.

DSC_0111 - Version 2Of course, I drank coffee on Saturday from my Tim Horton’s mug while eating my muffin – anything else could have been considered sacrilegious…

For now, I’m going to share with you the recipe.  Because you need it.  And frankly, as my sister says, “Muffins are a good excuse to eat cake for breakfast.”

You can make it up to me later.  I hope you love them as much as we did.  I have plans to make them again soon!

DSC_0110

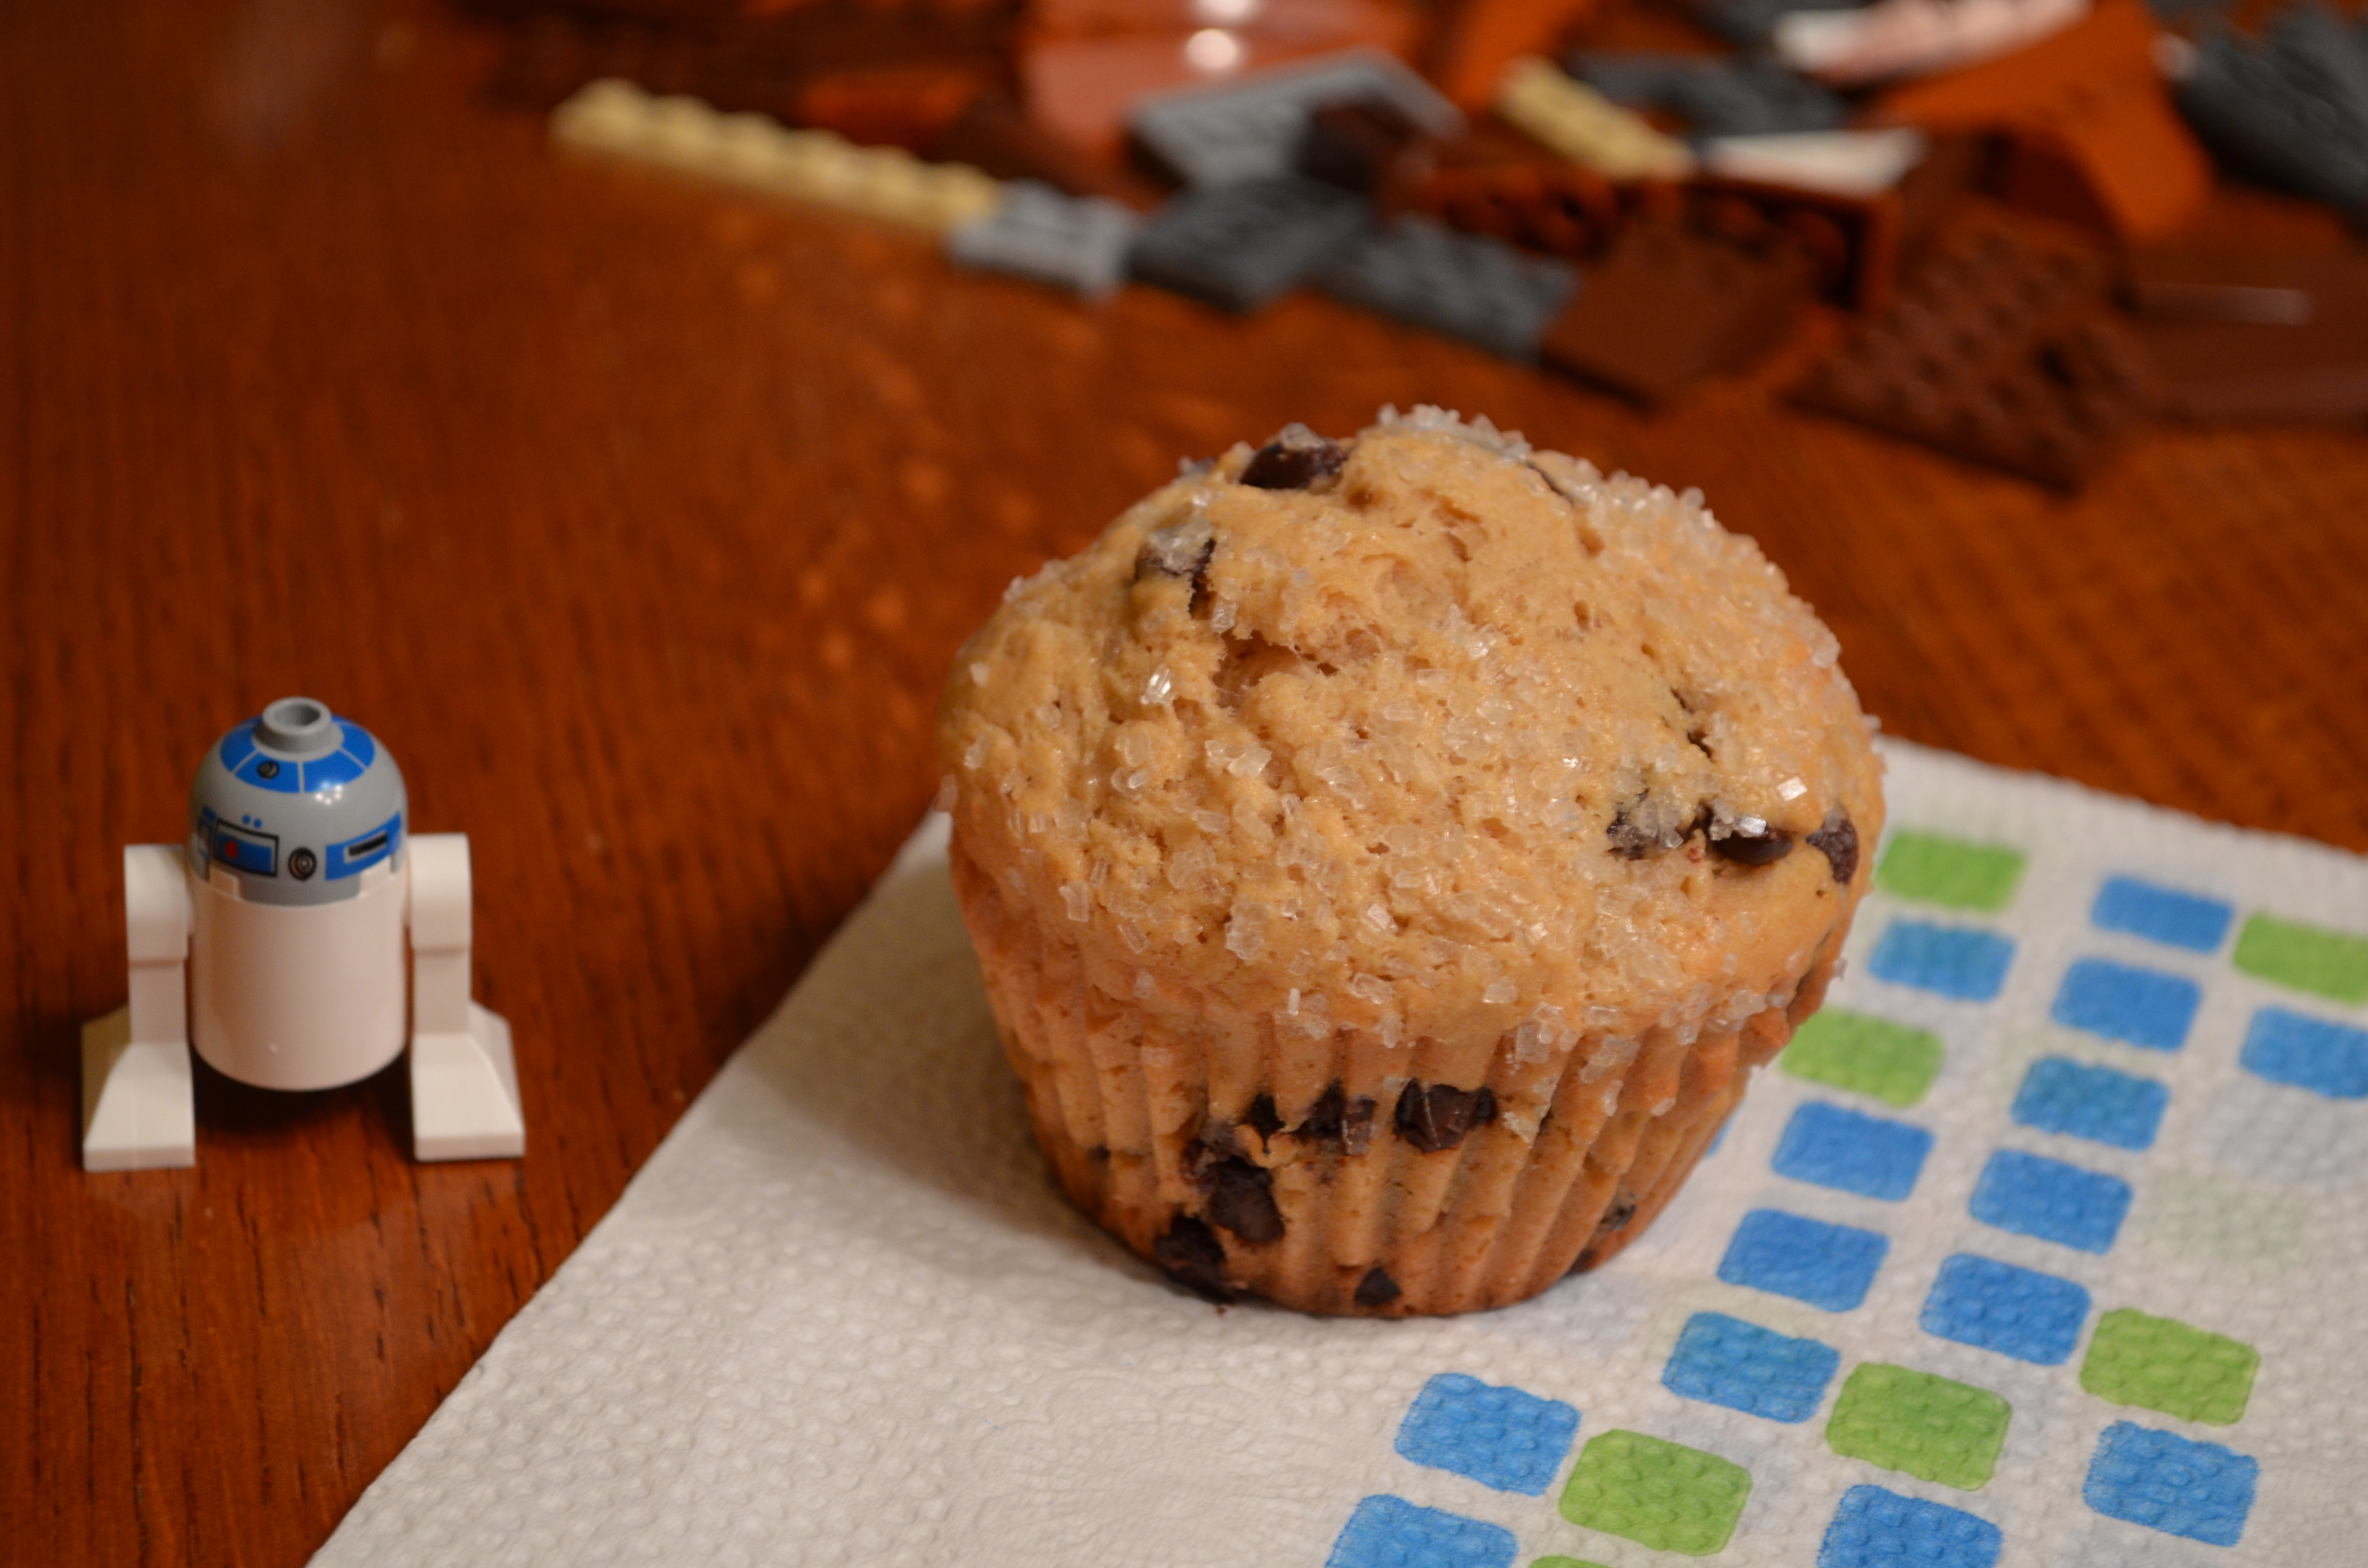
(Saturday morning breakfast is typically accompanied by playing with legos… )

(almost) Tim Horton’s chocolate chip muffins:

Ingredients:
2 C all purpose flour
1/3 C sugar
1/3 C light brown sugar
2 tsp baking powder
1/2 tsp salt
1/2 cup unsalted butter, melted & cooled
2 large eggs, lightly beaten
2/3 C buttermilk
2 tsp vanilla extract
1 1/4 C chocolate chips (semisweet)

1.  Preheat oven to 375 degrees. Line 12 muffin cups with paper liners. Set pan aside.

2.  In a large bowl, whisk together flour, sugars, baking powder and salt.

3.  In a medium bowl, stir together melted butter, eggs, buttermilk and vanilla extract until well blended. Make a well in the dry ingredients and gently stir in wet ingredients until combined. Stir in chocolate chips.

4.  Spoon batter into muffin cups. Bake 17 – 20 minutes. Cool before serving.

Note:  I usually take either turbanado sugar or decorator sugar crystals and sprinkle a pinch on top of each muffin before baking.

ENJOY!!!

DSC_0109

in my kitchen

what to do with zucchini…

It is the best time of year to make one of my very favorite dishes:  zucchini lunch.  Oh man! It is cooking on my stovetop right now, as I type.  The aroma is starving me, and launching my memory back 20 years…

It was the summer of 1991, just before my junior year in high school and my family had just moved to Bowling Green, Ohio.   There was a lot of “new” happening;  new house, new town, new church, new school, new classes and hopefully soon, new friends.

That summer passed by pretty slowly. In fact, it dragged on.   I remember specifically an older couple from the church my dad was pastoring invited us over for dinner one evening.  At just under 16, I remember thinking this would not be very exciting. In fact, I recall wishing Mom and Dad would let Marilyn and I stay home.  No luck.

So we went to dinner at the Harris home, not knowing what to expect.  And really, to most people, it wouldn’t seem as though anything extraordinary happened.  Except, it was special to me.  Mrs Harris had prepared Zucchini Lunch, along with several different kinds of salads and a good ol’ fashioned relish tray including some of her pickles.  She was an extraordinary cook and it was delicious.  But, more than that it was kind of reminiscent of eating  at my grandmothers home.  In short -for this young girl it was an evening of comfort.

In the middle of days and weeks of uncomfortable and adjustments, that little bit of hospitality, and zucchini, went a long way towards putting my heart at rest.

Long after that evening, before I left home and moved to Tennessee, I made sure that I had Mrs. Harris’ recipe for Zucchini Lunch in my possession.  Without fail, I make it several times every summer.  And I make it for others, because you never know how necessary that “zucchini kind of hospitality” might be for someone else!

So, what should you do with your zucchini?   Share it, bake goodies with it, cook it, soup it, sautee it, garlic-butter-parmesan broil it.  But whatever you do, give it with grace and love to someone, because your hospitality may be more important than you could possibly know.

photo 2

Here it is!  Zucchini Lunch

This recipe is one of my favorites.  Its a calorie and a carb saver. I make it a lot in the summer because it is seriously delish with fresh veggies, but is good in the winter too.

ingredients:
1 lb ground beef (browned and drained)
2 c tomato – chopped and seeds removed
1 c diced onion
1 c diced celery
1/2 c diced green pepper (I added some red pepper this time, too)
3 c diced zucchini
1 pkg of sloppy joe seasoning
(maybe a tsp of sugar if your tomatoes are not very sweet – I never add sugar.)

Directions –
Chop all the stuff up. Brown the meat – in a larger pot, or electric skillet. Then add all of the ingredients into the skillet. Let it cook down to your desired consistency. I tend to let it cook on low for several hours til it is the consistency of a really thick sort of sauce or stew and all of the chunks kind of soften and disappear. When it reaches the thickness you like, you just stop the cooking.

I serve it over whole wheat pasta or brown rice. You could put it over a baked potato or eat it with tortilla chips, wrap it in a tortilla or eat it over a salad.  Completely versatile!

YUM!  Enjoy, from my heart to yours!

in my kitchen

accidental yumminess

Over the weekend I set out to make a recipe that I found on Pinterest;  a healthy one, for chicken salad.  It had wheat berries and chicken, almonds, Brianna’s lemon dressing, honey and grapes. oh, and onion. I was pumped to try it.

Until I realized I did not have wheat berries, the dressing or the onion.  or the feta.

I’m not proud of what I’m about to tell you. Typically I ignore recipes when it comes to cooking.  If I see a recipe that I like, often I will go for it, surrendering one ingredient and replacing it with another, that kind of thing.   When baking I would never, ever do that – but, somehow with cooking I take liberties.  lots of them.

Sometimes it is a delightful serendipity.  But, Michael will tell you that sometimes it is bad.   There are no guarantees in my kitchen.  And I will say that my successes are typically mishaps.  Like this recipe.

DSC_0346

What I made this weekend turned out super yummy, on accident.  And I will make it again soon!  I give you:

Crunchy Quinoa Chicken Salad.

Ingredients:

1 lb of chicken breast
a bunch of grapes, cut in half
1 heaping cup of cooked quinoa
1 tbsp of honey
1/4 cup of poppy seed dressing (I used Brianna’s)
1/2 tbsp of vinegar
2 tbsp lemon juice
chopped or sliced almonds
(I didn’t have feta, but I intend to use it next time)

Instructions:

Bring two pots of water to boil.  Boil the chicken for about 20 -30 minutes.  Cook the quinoa, as directed in the other pot.  (I cooked a cup of quinoa – which yields about 3 cups – I only used a heaping cup of cooked quinoa in the salad.)

While the chicken and quinoa cook, chop the grapes, and roughly chop the almonds if you’d like.  Then whisk together the olive oil, honey, poppyseed dressing, vinegar and lemon juice.  Pop it in the refrigerator to chill.

Drain your quinoa when it is finished cooking and let it cool.  When the chicken is finished cooking and cooled enough to handle, shred it and add some salt and pepper.  Combine your ingredients in a bowl, and top with the feta and almonds.

I ate mine with black pepper triscuits, but you could eat this over a bed of greens, or in a pita, or wrap.  I think it could be good lots of different ways, so be creative!

in my kitchen

two for one

The first week of our summer holiday has almost come and gone…  Here at my house we’ve made the most of it!  Nothing major, I suppose – but very enjoyable.  A trip to the pool.  A few visits to the park.  Some good play time with friends.  All in all, we are off to a good start.

But, I’m in a bit of a quandry.  Monday we had company and I made a Blueberry Chocolate Breakfast Cake that was absolutely delicious.  I was sure that I was going to share the recipe for it here, until today.

Today Isaac came across this idea somewhere and I ended up making these oreo chocolate milk shakes.  Milkshakes definitely qualify as the quintessential summer treat, especially when oreos and chocolate are involved.  How can I not share that albeit simple, recipe with you?

So, I decided.  I’ll give both to you.  Because it is summer.  and everyone loves 2 for 1, right?

Cake first.

DSC_0348

Blueberry Chocolate Breakfast Cake. (this recipe is taken from iambaker.net )

Ingredients

  • 4 cups all-purpose flour
  • 1 tbsp unsweetened cocoa powder
  • 4 teaspoons baking powder
  • 1/2 teaspoon salt
  • 1 cup butter, softened
  • 2 cups sugar
  • 4 eggs
  • 1 cup milk
  • 1/4 cup vegetable oil
  • 2 teaspoons vanilla extract
  • 2-3 cups frozen unsweetened blueberries (depending on size of blueberries)

Instructions

  1. In a large bowl combine the flour, cocoa, baking powder and salt.
  2. In stand mixer cream butter and sugar until fluffy. Add eggs, milk, oil and vanilla; mix on low for about 1 minute.
  3. Add dry ingredients to butter mixture and blend on medium for 30 seconds.
  4. Remove bowl from mixer and fold in frozen blueberries. (To help keep blueberries from falling to the bottom, sprinkle them with a couple tablespoons of flour prior to adding into batter.)
  5. Bake at 375° for 22-28 minutes or until a toothpick comes out clean. Muffins take about 20 minutes.

DSC_0349

Isaac’s Oreo Chocolate Shake

Ingredients:  2 cups of vanilla ice-cream, chocolate syrup, 1 cup milk, oreos (5-6, or 10 or 50) whipped cream.

Instructions:  put ice-cream, milk and oreos in a blender and mix until thick and smooth, or to the consistency you prefer.  squirt syrup in the bottom of your glass, pour in shake, top with whipped cream.  **** we sprinkled with mini chocolate chips!****

I hope you’ve enjoyed your first week of summer as much as we have!  Maybe you should celebrate with one of these yummy treats!  🙂

md

in my kitchen

Melody’s (new favorite) Muffins

In 1983, when we were living in Canada, on Maxwell crescent, in London, I remember a culinary revolution.  Or, well, that’s what it seemed like in my mind as a fourth grader.  My mom started the happy habit of baking muffins.  blueberry muffins.  chocolate chip muffins. zucchini muffins.  morning glory muffins, banana muffins and the list goes on and on….

Muffins were all the rage, especially healthy muffins with substitutionary ingredients like apple sauce instead of oil and oat bran instead of so much all purpose flour.  My Mom embraced this new trend whole-heartedly.  And so did we, especially if there were chocolate chips in her creations.

I do remember one incident where Mom made orange muffins without butter.  They were supposed to have butter, but she left it out on accident.  Mom is typically a pro when it comes to multi-tasking, but on that busy day the muffins fell thru the cracks and the butter was left out of the batter.   Never has there been a more terrible, awful baked good than those orange muffins without butter.  But, I digress…

Well, as I have been working at changing some of my personality in the kitchen, I have been looking for ways to bake and cook that are healthier.  And there are a myriad of  healthy choices when it comes to muffins.  I have been pinning recipes, and bookmarking other options in hopes of finding something to bake.

Today, without warning, I came across the perfect muffin recipe and within moments of reading it, I was in my kitchen pulling out utensils and finding ingredients.  And this is what I baked:

DSC_0076

The kids love them.  I loved them as well, especially while they were still warm with a little pat of butter.  These muffins did not have butter in them either, but they were not supposed to.    Since my taste-testers wanted seconds immediately, I figure the recipe might be worth sharing with you…  (My Children are no respecter of baked goods.  They’ve been known to stare down other muffins before and refuse to eat them.)

I got this recipe from Pioneer Woman’s website, but I edited it and made it my own, so we’ll call them:

Melody’s new favorite Muffins.  (I know, I know – super creative title, right?)

Instructions:

  • 1 cup Whole Wheat Flour
  • 1/2 cup All-purpose Flour
  • 1/4 cup 7-grain cereal (similar to other dry cereals, includes flax, oat bran and other grains)
  • 1 cup Regular Oats
  • 1/2 cup Packed Brown Sugar
  • 1/2 teaspoon Salt
  • 1 teaspoon Baking Soda
  • 2 teaspoons Baking Powder
  • 3/4 cup semisweet chocolate chunks
  • 1 cup Buttermilk
  • 1 whole Egg
  • 1 whole Banana, Peeled And Mashed With A Fork
  • 1/2 cup Applesauce
  • 1/4 cup Molasses
  • Extra Buttermilk As Needed For Thinning

Instructions

Preheat the oven to 350 F. Thoroughly grease a 12-count muffin pan, or use muffin cup liners.

In a large bowl, combine flours, 7-grain cereal, oats, brown sugar, salt, baking soda, baking powder and chocolate chunks. Stir together until combined.

In a separate bowl, mix together the buttermilk, egg, banana, applesauce and molasses.

Pour the wet ingredients into the dry ingredients, stirring until it just barely comes together. Batter should be wet and sticky; if needed, splash in a couple extra tablespoons of buttermilk.

Scoop 1/4 cup helpings into the muffin cups and bake for 16-18 minutes, or until deep golden brown.

Serve warm with softened butter.  yum.

Hope you enjoy them!

friends and loved ones · in my kitchen

after a long absence from my kitchen….

DSC_0055

DSC_0046

So, this weekend my very bestest friend of 22 years came to visit me for her birthday.  And it was wonderful. I’ll be honest:  We didn’t really do a whole lot.  A lot of chilling out and relaxing is what went on for the majority of the weekend.  Oh and talking.  lots of talking and catching up.

However, I did bake a birthday cake.  I haven’t been baking much lately, so it was a lot of fun to get back to my Kitchen-Aid and my oven. Needless to say, I enjoyed making her cake immensely.

Since she had made the long journey from Utah, I decided my cake needed to be equally epic.  And it was!   I let my guest choose from a long list of delectable options, and she chose well!

On this Monday morning I’m going to taunt you with the recipe and the photos.  Because I can.

DSC_0057

Mint Chocolate Chip Cake  (this recipe is from the blog Shugary Sweets.)

FOR THE CAKE:

1/2 cup butter, softened
1 1/2 cup sugar
2 eggs
1 1/2 cup flour
9 Tbsp unsweetened cocoa powder
1/2 tsp salt
1 tsp baking soda
1/2 tsp baking powder
1/2 cup brewed coffee, cooled
1/2 cup milk

FOR THE FROSTING:

1 cup butter, softened
8 cup powdered sugar
1/2 tsp peppermint extract
1/2 cup milk plus 2 Tbsp
11 oz dark chocolate chunks (62%cacao) or mini chocolate chips
1/8 tsp green food coloring gel

FOR THE GANACHE:

3/4 cup heavy cream
1 1/2 cup semisweet chocolate morsels
1/4 tsp peppermint extract

1. In medium bowl, sift cocoa with flour, salt, baking soda and baking powder. Set aside. In measuring cup, mix coffee and milk together. Set aside.

2. In mixer, beat butter and sugar for about 5 minutes until smooth. Beat in eggs one at a time. Slowly add in dry ingredients alternating with the coffee/milk blend (about 3 additions of each).

3. Pour cake batter into two prepared pans (two 9inch cake pans lined with parchment paper and then greased and floured). Bake in a 350 degree oven for about 25 minutes. Remove and allow to cool about 10 minutes before removing from pans. Cool completely before frosting.

4. For frosting, in food processor, pulse dark chocolate until small bits (not powder)! Set aside.

5. In mixer, beat butter, powdered sugar and milk (slowly add the milk, you may not need it all) for 3-5 minutes, until smooth and creamy. Add in extract and food coloring gel. Mix until fully blended. Add more milk if necessary to desired consistency. Fold in chopped dark chocolate or chocolate chips.

6. Frost first layer of cake, then top it with second layer. Completely frost sides and top of cake.

7. For the ganache, heat 3/4 cup heavy cream in saucepan. Bring just to a boil and remove from heat. Place chocolate chips in a bowl then slowly add in hot cream and extract. Stir until smooth and completely combined. Allow ganache to cool then pour over chocolate cake.

This recipe is totally worth every ounce of effort for your next special occasion, even the occasion of surviving this Monday!

Have a great week everyone!

DSC_0075

DSC_0065

in my kitchen

a coconut rum kind of holiday…

So, I decided to do something a little wacky.  I’m baking coconut rum cakes to give as gifts to a few people on my list.  I’ve never baked with liquor before, let alone this recipe, so I felt like a big risk taker, when I set out yesterday on my baking spree.  Yep that’s me.  Baker turned high roller.

Well, when I mentioned it on Facebook, I had requests for the recipe, so – I thought I’d share it here with you and give some Christmas love and cheer.  Honestly, if you could have smelled the aroma coming from my kitchen yesterday, you would know that you need this in your Christmas holidays.  Yes, its true – I would not lie to you, baby…

And just to taunt you, I’m including a few pictures to make your mouth water.

DSC_0372the lightly toasted coconut and pecans

DSC_0374cake cooling, and waiting for the next round of butter rum glaze.

DSC_0375

okay, I’ll admit, it was a little harder to get out of the pan than I expected (note, there’s a small mishap on the left, there)- but, I have plans in place so that won’t happen on the next one…

DSC_0376

And still, its worth giving away –  the flavor is so amazing!  (I happen to know, because of that little mishap!)

So, now that I’ve whet your whistle, here’s the recipe!  If you try it, I hope you love it!  Just be sure to use Baker’s Joy, really thoroughly on your bundt pan!  (words of wisdom from a voice of experience.)

Coconut Rum Cake with Dark Rum Butter Glaze

***Recipe from sweetrevelations.wordpress.com***

Ingredients:

Cake:

  • 1/2 cup chopped, toasted pecans
  • 1/2 cup toasted coconut
  • 1  18 ounce box yellow cake mix
  • 3.4 ounces (4-serving size) instant coconut pudding mix
  • 4 eggs
  • 1/2 cup cold milk
  • 1/2 cup canola oil
  • 1/2 cup Coconut Rum

Glaze:

  • 1/2 cup unsalted butter
  • 1/4 cup water
  • 1 cup sugar
  • 1/2 cup Dark Rum

Instructions:

Cake: Preheat oven to 325 degrees F. Grease and flour 12-cup Bundt pan. Sprinkle nuts and coconut on bottom of pan. Combine all cake ingredients. Beat for 2 minutes on high with electric mixer. Pour into prepared pan. Bake for 1 hour. Cool in pan for 15 minutes. . Prick bottom of cake (still in pan) with wooden skewer. Drizzle 1/2 of glaze over holes in bottom of cake. Let sit for 40 minutes.  Invert cake onto cake plate and poke holes in the top with wooden skewer.  Poor or brush remaining glaze over top.  I made extra glaze (with a little less water) to drizzle on the cake  just before serving.  Next time I would omit it.  The cake has more than enough flavour without it.
Glaze: Melt butter in saucepan. Stir in water and sugar. Boil 5 minutes, stirring constantly. Remove from heat and stir in rum. Note: The rum will cause steam. Be careful not to burn yourself.
in my kitchen

When tragedy turns out for (better than) good…

Nothing could have been more tragic last night than my cupcakes.  Let me explain the whole situation, from the beginning…

Yesterday afternoon I set out making cupcakes; some for a friend’s birthday lunch today, and the rest for a dinner meeting I’m supposed to attend on Tuesday evening.  This is my normal routine.  I make the cakes ahead, freeze them a day or two and then frost them the day of the event.  Nothing unusual here.  So, I made the cake batter, and it tasted fine.   You can trust that analysis, I checked at least twice, maybe more.  At any rate, I popped them in the oven and went about my business.

When the timer began beeping, I checked the cupcakes and they appeared to be finished baking.  I pulled them out to let them cool on the counter.  I stepped away from the kitchen for a while.  I’m a mom, with many things to do – time to sit around in my kitchen is not a luxury I have at this time in life.  So, you can imagine my surprise when I came back to gather my cooled cupcakes and put them in the freezer.

There were my precious little beauties, complete with a sunken center.  And by sunken, I mean cavernous, huge valleys in the middle of every one.  My heart fell to the bottom of my stomach with disappointment.  Now what?  I wasn’t going to have time to go back to the store to get all of the ingredients for a second batch…

I hid them away in a container in my deepfreeze, to wait there for morning.  Surely things would seem better after a good night’s sleep.

I got the chocolate cupcakes back out this morning and there they were.  Still sunk, just like I felt.  My friend would arrive to celebrate her birthday in less than an hour.  My peppermint butter cream was ready and waiting, but I didn’t have enough to fill those humongous holes.  What to do, what to do?

hmmmmm…..

And then I remembered some chilled chocolate buttercream in my refrigerator.  a moment of inspiration…  Maybe….  just maybe.   Could it work?  Was there salvation for my situation?

I grabbed my tiniest cookie dough scoop and began filling each of the crater-like cupcakes with thick, cold, chocolate frosting.  And then I piped peppermint buttercream over it. They looked like the most normal, cute, yummy, cupcakes decorated with delicious sweet creamy goodness.  But I knew their secret which would most likely never be discovered by their devourers. (ahem, except in the situation that someone blogged to the whole world wide web about it.)

Do you know that these tasty morsels turned out to be some of the best cupcakes I’ve ever made?  What was probably a small-ish tragedy definitely turned out better than good.

Here’s the rub.  I want to quote Romans 8:28 here, but I can’t, because I don’t really believe it fits.  He doesn’t promise me “all the time” happiness and comfort.  He doesn’t say that He will make my mistakes turn out golden.  He just doesn’t.  But, He has given ability, and inspiration at just the right time, in order to help me do even the smallest tasks He’s given me to do, like bless a friend with a Birthday cupcake that’s delicious.  And, when I need the strength and “know-how”  He supernaturally seems to dispense it at just the right time. And ultimately, if He wants to, He can take any of my in-abilities and make them into something wonderful.  For His good work.

He promises to give me the power to do this work that He’s called me to do, no matter how big or how small – and I think that includes sharing a little love  from my kitchen with someone.  I guess maybe this Scripture from Philippians 1 is the promise I need to remember:

being confident of this, that he who began a good work in you will carry it on to completion until the day of Christ Jesus.

DSC_0377

Before, my man-made disaster.

DSC_0378

After, a decadent success, by His mercy.

a bit of history · in my kitchen

rabbit

I have a Thanksgiving memory  from my childhood.   Its stands out head and shoulders above the rest and I will never ever forget it….

I was probably 12, or so and we were spending the holiday with my dad’s family in Iowa.  My mom and aunts, my mammaw and my GG had been cooking and preparing for days it seemed and now the day had arrived.  The big feast was just moments away.

The table was set.  Everything smelled so good… and then it happened.  My GG came in, from her house across the way, with the food she had prepared.  And I heard her say to my Uncle Larry, “I brought Peter with me.”

Now, my uncle had been out hunting recently.  And little did we, the kids, know that he had caught a rabbit.  But as the women began to set the food out, the story of the rabbit unfolded – and at the end of the tale he was laid to rest, in a casserole dish, right there in the middle of  our Thanksgiving table.

I’ll give you a minute to absorb this information.

Of course, my mother encouraged my sister and I to take a spoonful of it.. to try it… we might like it.  and there it sat – a helping of bunny casserole – on my plate.  It seemed to be ruining all of the other wonderful, delicious food I had selected.

I sniffed it, I stared at it. But I could not bring myself to taste it.  So, in case you’re wondering what rabbit tastes like – I have no helpful information coming from my own experience.  However, I hear it tastes like chicken, but a bit gamey.

Life is like that Thanksgiving plate for me sometimes.  So many incredible things make up what is known as my life – more than I can count, really.  But there, in the middle – sitting like that lump of rabbit, I assure you there is a problem, a complicated situation, its a painful trial that I’m going through. And I would like to scrape it off of my plate into the trash so that there are only nice things.  Only the tasty blessings, nothing unsavory, please…

But, this is not the plan God has for us…  Trials and pain are often on the same plate, being served up along side large portions of blessing.  And He asks us to be grateful, joyful and rejoice in all things.

James 1 says: Consider it pure joy, my brothers and sisters, whenever you face trials of many kinds, because you know that the testing of your faith produces perseverance.

Philippians 4 says:  Rejoice in the Lord always. I will say it again: Rejoice!

I must admit – that I think of my difficulties in the same way I did the rabbit.  No thank you… Where’s the garbage can, I need to get rid of this.  I want no part of it.   But today, the day before Thanksgiving I realize that He is calling me to be thankful, not just for the wonderful, but for the difficult too.  Even the rabbit.

Heavenly Father, Help me to find a new place of gratitude.  Soften my heart to your Words – that every gift is perfect and it is from You.  Forgive my ungrateful heart.  Give me the grace to change and a steadfast heart to remain thankful.  amen.

md

(originally written Thanksgiving 2010)

in my kitchen

the promise of turtle cake…

A while back on the blog, I relived the brief, yet unfortunate trial from my childhood known as raisin pie.  Oh how I do not like raisin pie.  From way back then, until now – I still feel that raisins in pie will always be terrible.  just terrible.

But, I promised – at the end of the blog about raisin pie that I would share with you the recipe of turtle cake – and so I thought I’d make good on my word.   As I’ve been thinking about raisin pie and turtle cake I came to a realization…  the experience of raisin pie makes the thought of turtle cake that much sweeter.  hmmmmm….

It is that way in my life as a believer too.  No matter what the difficult circumstances, the hardships present or past – I probably won’t ever think they are fabulous.  No, its not likely I’ll embrace them with fondness.  But, as I walk through them day to day, one thing is true; the trials and heartbreak make Jesus so much more lovely, more wonderful.   As He fulfills His promises of peace and comfort, justice and mercy, I am drawn to Him.  The struggles become peripheral, and I find Him at the very center of my heart’s delight; the truth of who He is, absolutely decadent.

Whatever happens there is always the promise of Him, His never-ending goodness and His unswerving faithfulness.

Psalm 37: 3-5

3Trust in the Lord, and do good;  Dwell in the land, and feed on His faithfulness.
Delight yourself also in the Lord,  And He shall give you the desires of your heart.
5Commit your way to the Lord,  Trust also in Him,  And He shall bring it to pass.

Lord, May I find your lovingkindness sweeter than life.  Let me dwell on the goodness of your will always.  amen.

**********************************

As promised….   Turtle Cake

Ingredients

1 German Chocolate Cake Mix (18.5 oz) (+ ingredients for cake, required on the box)
1 14 oz package of caramels
1/2 cup evaporated milk
6 tbsp butter
1 c chopped pecans
1 c chocolate chips

Instructions

Preheat oven to 350.  Mix cake by box directions.  pour 1/2 of the batter into a greased and floured 9×13 pan.  set aside the remaining batter.  Bake first half of batter for 18 minutes. Meanwhile, in a sauce pan,melt caramels, milk and butter – and stir in the nuts.  pour over the baked cake and sprinkle with chocolate chips.  Pour the reserved batter over the top and bake for another 20 minutes until done.

ENJOY!  It is a delightful, decadent dessert!  YUM!